Nutella Banana Swirl Muffins

We always have bananas on hand. Always. I don’t think we ever come home from the grocery store without bananas. And we always have Nutella, because well, Nutella! I haven’t baked anything the last couple of weeks, so we’ve been out of things to munch on. So why not combine some of our old bananas and some of that Nutella to make muffins?

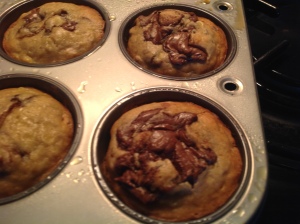
These came out great. I didn’t do such a great job swirling the Nutella, but that worked out to my delight. They had like a big clump of Nutella in the middle. It’s like a gooey chocolatey surprise.

Nutella Banana Swirl Muffins

IMG_0078

Adapted from thenovicechef.com

http://www.thenovicechefblog.com/2013/01/nutella-banana-swirl-muffins/

Ingredients:

  • 2 cups all-purpose flour
  • 1 teaspoon baking soda
  • 1 teaspoon baking powder
  • 1/2 teaspoon salt
  • 4 medium over-ripe bananas, mashed
  • 1/2 cup granulated sugar
  • 1/2 cup packed brown sugar
  • 1 large egg
  • 1/4 cup vegetable oil
  • 2 teaspoons vanilla extract
  • 1/2 cup chopped pecans
  • nutella

Directions:

  1. Preheat oven to 350°F. Grease muffin pan or line with paper liners.

  2. In a medium bowl, whisk flour, baking soda, baking powder and salt until well combined. Set aside.

  3. In large bowl, whisk together banana, sugar, brown sugar. Beat in egg, vegetable oil and vanilla extract. Slowly whisk in the flour mixture, until there are no lumps. Fold in pecans.

  4. Fill muffin tins 3/4 full (about 1/3 of a cup of batter). Top each muffin with about 1 teaspoon of Nutella and use a toothpick to swirl it into the batter.

  5. Bake muffins for 15-17 minutes, or until a toothpick inserted in the center comes out clean.

  6. Serve warm or store in an airtight container until ready to serve.
Dark Chocolate Brownies

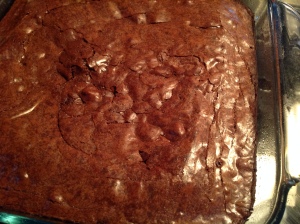
I may be the world’s pickiest dessert eater. When it comes to chocolate, I cannot stand for it to be anything less than 60% cocoa. No milk, no white, nuhuh, no way. And when it comes to brownies, they had better be nice and dark and rich and ooey gooey. And of course, they had better not have nuts in them. They can have a fudgy frosting on top with nuts but they cannot be in the brownie. So here I have found the best dark, rich brownies I have ever had.

Some tips:

  • These brownies can be made in an 8″x8″ pan or a 13″x9″ one. The directions are for a 13″x9″ pan. If you make them in a square pan like I did, up the cooking time to about 50 minutes.
  • Brownies are so versatile. Sprinkle some powdered sugar on them or serve them fudgie-budgie style with ice cream, chocolate sauce, and whipped cream.
  • If you’re like me, you may have forgotten the cocoa powder altogether. Whoopsie. Don’t worry. They still taste just fine.

Dark Chocolate Brownies

IMG_0076

Adapted from thepioneerwoman.com

http://thepioneerwoman.com/cooking/2014/01/dark-chocolate-brownies/

Ingredients:

  • 1 cup butter
  • 5 oz unsweetened chocolate
  • 1/4 cup cocoa powder
  • 2 cups sugar
  • 1 TBSP vanilla
  • 3 large eggs
  • 1 1/4 cup flour
  • 3/4 cups semi-sweet chocolate chips

Directions:

  1. Preheat the oven to 350°F. Grease a 13″x9″ pan.
  2. In a medium/large saucepan, melt the butter and unsweetened chocolate over low heat. Stir occasionally until smooth and melted through. Sprinkle in cocoa powder and whisk to combine. Remove from heat and let cool.
  3. Stir in the sugar and vanilla until just combined.
  4. Mix in the eggs one at a time.
  5. Stir in the flour until halfway incoroporated then add the chocolate chips.
  6. Pour batter into the greased pan.
  7. Bake for 40 minutes, or until a toothpick comes out clean.
  8. Save your corner pieces for me!

Peach Cobbler

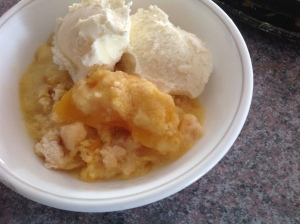
This is the world’s easiest peach cobbler. I like to call it The “MacGyver” Recipe. It’s so easy and addicting. And of course, it’s always best when served warm and a la mode.

Some tips:

  • You don’t have to drain the peaches. It has a more soupy consistency then but still just as tasty.
  • If you don’t like peaches, this works very easily with any kind of fruit: fresh, frozen, or canned.

Easy Peach Cobbler

IMG_0073

Ingredients:

  • Canned peaches (2 15 oz cans or more)
  • Box of yellow cake mix
  • 1 stick butter

Directions:

  1. Preheat the oven to 350°F.
  2. Drain the canned peaches and place into a 9″x13″ cake pan.
  3. Layer the cake mix on top of the peaches.
  4. Melt the stick of butter and pour evenly onto the top of the cake mix.
  5. Bake for 35-45 minutes, until the top is golden brown.

French Silk Pie

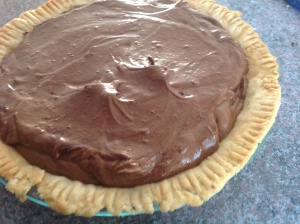
Happy Pi Day, folks! Yes, today’s date is 3.14. And what more reason does a little math-centric girlie like me need to make a pie?

I have never made a whole pie from scratch before. I have made a pie crust once in my entire life and that time I used a canned pie filling. Usually, I just buy pie crusts and then make the filling from scratch. Today, however, I felt the need to challenge myself.

When I started trying to decide what to make for Pi Day (like three weeks ago), I had a Certain Someone make an ordered list of his favorite kinds of pie. Of course, french silk was the top one, chocolate lover that he is. I researched different recipes and narrowed it down to two different ones. I liked the traditional crust recipe in the first and the filling recipe in the second. So I decided to combine the two.

So celebrate today. Bake a pie. Watch The Life of Pi. And remember, the circumference of your desert is 2πr.

Some tips:

  • For me, it took about 6 TBSP of water to form the crust.
  • Also, the time it takes for the crust to cool is about how long it takes to make the filling.
  • Don’t eat too much of the chocolate!

French Silk Pie

IMG_0072

The Crust:

Adapted from bakerbettie.com

Chocolate French Silk Pie

Ingredients:

  • 1 1/2 cups flour
  • 1/2 cup shortening
  • Pinch of salt
  • Ice water

Directions:

  1. Preheat oven to 400ºF.
  2. Cut the shortening into the flour and salt using a pastry cutter (or a fork if you don’t have one like me). It will be really crumbly.
  3. Add 1 TBSP of ice water at a time and mix until the dough forms a ball.
  4. Roll out the dough and place into a pie dish. Crimp the edges using your fingers or a fork. Dock the dough several times in the bottom and the sides using a fork.
  5. Place some parchment paper on top of the dough and fill with dry rice, beans, or pie weights if you have them.
  6. Cook the pie crust in the oven for 15 minutes. Remove the parchment paper and weights and cook the crust for 10 minutes longer, or until it’s golden and flaky.
  7. Let the crust cool completely before filling.

The Filling:

Adapted from browneyedbaker.com

http://www.browneyedbaker.com/2014/02/12/french-silk-pie-recipe/

Ingredients:

  • 1 cup heavy cream
  • 8 ounces bittersweet chocolate, finely chopped
  • 3 eggs
  • ¾ cup granulated sugar
  • 2 tablespoons water
  • 1 tablespoon vanilla extract
  • 8 tablespoons unsalted butter, at room temperature, cut into ½-inch pieces

Directions:

  1. Pour the heavy cream into a large mixing bowl and whip on medium-low speed until foamy, about 1 minute. Increase the speed to medium-high and continue to whip until stiff peaks form, 2 to 4 minutes. Transfer the whipped cream to a small bowl and refrigerate until needed.
  2. Place the chocolate in a microwave-safe bowl and microwave on 50% power in 30-second increments, stirring after each, until completely melted and smooth. Set aside.
  3. In a large, heatproof bowl, whisk together the eggs, sugar and water. Beat the mixture on medium speed until pale yellow and thick, about 5 minutes. Set the bowl over a medium saucepan filled ½-inch of barely simmering water over low heat, and warm the mixture, stirring occasionally, until it reaches 160 degrees F on an instant-read thermometer. Remove the bowl from the heat and beat the mixture on medium speed until it is light and fluffy and cooled to room temperature, about 8 minutes.
  4. Add the melted chocolate and vanilla extract to the cooled egg mixture and beat until incorporated. Beat in the butter, a few pieces at a time, until well combined. Using a rubber spatula, fold in the whipped cream until no white streaks remain. Scrape the filling into the pie shell and refrigerate until set, at least 3 hours or up to 24 hours. Serve with fresh whipped cream.

Blueberry Muffins

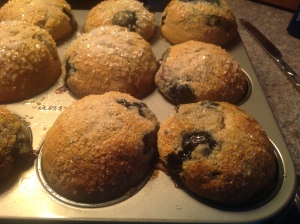
I am not a big fan of “sweet” breakfast foods. Even though I will make them and eat them, I never choose to eat pancakes or waffles. Give me some toast or some eggs. But muffins, I’ll make an exception for muffins. A muffin and a cup of tea is a good way to start any day.

Usually, I’ll just settle for store bought muffins, but homemade is always a better way to go. I’ve tried a few different recipes for blueberry muffins, but this one is my favorite so far. The cinnamon makes all the difference.

Some tips:

  • Make sure to keep in mind that this recipe is set up for jumbo sized muffins but includes adjustments for standard sized and mini ones.
  • The recipe says you can make 15-16 standard sized muffins. I made 12. It made some of them extra “dome-y” but they still taste great. Simply leave them in at 375 for a couple of extra minutes.
  • Muffins are like pancakes – don’t overmix them.

Blueberry Muffins

IMG_0069

Source: Adapted from Sally’s Baking Addiction

http://sallysbakingaddiction.com/2013/01/07/sparkling-jumbo-blueberry-muffins-2/

Ingredients:

  • 3 cups all-purpose flour 
  • 4 teaspoons baking powder
  • 1/2 teaspoon salt
  • 1 teaspoon ground cinnamon
  • 2 eggs, room temperature preferred
  • 1 cup granulated sugar
  • 1 cup milk*
  • 1/2 cup canola oil (or vegetable or melted coconut oil)
  • 1 teaspoon vanilla extract
  • 1 and 1/2 cups fresh or frozen blueberries
  • coarse sugar for sprinkling (optional)

Directions:

  1. Preheat oven to 425F degrees. Spray your muffin tin of choice with non-stick spray or line with muffin liners. Set aside.
  2. In a large bowl, gently toss together flour, baking powder, salt, and cinnamon. Mix until all dry ingredients are combined – a 20 second toss to disburse everything together. Set aside.
  3. In a medium bowl, whisk together eggs and sugar until combined. Mix in milk, oil, and vanilla. Mixture will be pale and yellow. Fold wet ingredients into dry ingredients and mix everything together by hand. Avoid overmixing. Gently mix until all the flour is off the bottom of the bowl and no big pockets of flour remain. The batter will be VERY thick and somewhat lumpy. Fold in the blueberries.
  4. Pour batter into prepared muffin tins, filling all the way to the top. Top with a sprinkle course sugar, if preferred. Bake at 425F degrees for 5 minutes. Reduce oven temperature to 375 and continue to bake for 25-26 minutes until tops are lightly golden and centers appear set. Allow to cool for 10 minutes in pan before enjoying.
  5. Muffins taste best fresh the same day. Store muffins at room temperature in an airtight container for up to 5 days. Muffins freeze well for up to 3 months.

*Buttermilk is preferred for the moistest texture. 1% or higher milk fat of regular milk would be fine. Almond milk + soy milk are OK too. 

*For 15-16 standard size muffins, reduce baking time to 18-19 total minutes: 5 initial minutes at the 425F and 13-14 minutes at 375F. For 30 mini muffins, bake for 11-12 minutes at 375F the entire time.

Snickerdoodles

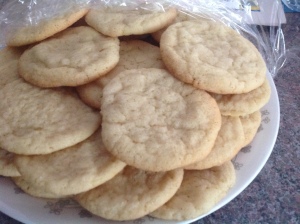
Everyone loves snickerdoodles. And no, I don’t just mean that everyone loves my cat. I’ve been making these cookies for longer than I remember and it’s one of the few baking recipes I know by heart. They’re simple to make and light and fluffy. In my opinion they’re much better than sugar cookies. They’re so much less work and the texture is much lighter.

P.s. Don’t worry, bestie. I’ll mail you your own batch later this week!

Some tips:

  • Snickerdoodles usually have a cake-like texture on the inside, but if you’re looking to cut calories, using splenda or another sugar substitute gives them more of a muffin-like texture.
  • Bake the cookies only until the edges are set, so that they retain their softness. Baking them longer will result in hard crunchy cookies.
  • I like mine a little extra cinnamon-y. For the sugar-cinnamon mix, I usually add about 2 tsp of cinnamon.

Snickerdoodles

IMG_0066

Ingredients:

  • 2 3/4 cups flour
  • 2 tsp cream of tartar
  • 1 tsp baking soda
  • 1/4 tsp salt
  • 1 cup (2 sticks) butter, softened
  • 1 1/2 cups sugar
  • 2 large eggs
  • 1 tsp vanilla
  • 3 tbsp sugar
  • 1 tsp cinnamon

Directions:

  1. Preheat oven to 350°F. Place parchment paper on a cookie tray and place it in the fridge to cool.

2. Mix the flour, cream of tartar, baking soda and salt in a bowl. Set aside.

3. Beat together the butter and the sugar using a mixer until fluffy.

4. Beat in the eggs one at a time. Add the vanilla.

5. Slowly add the flour mixture and mix just until it disappears.

6. Cover the dough and chill until it is set. This takes about 30 minutes.

7. Mix together the sugar and cinnamon.

8. Roll the dough into 1 – 1 1/2 inch balls. Roll the dough balls in the sugar and cinnamon. Bake them for about 10-12 minutes, until the edges are set.

9. Chill dough and cookie sheets between batches.

10. Let cookies rest on the baking sheet for about 3 minutes. Then let them cool completely on a cooling rack.

Banana Nut Bread

I have always loved baking, cooking, eating, all things food. In the past few months, I’ve been trying out so many new recipes, revisiting old favorites, and even developing a few of my own. So I have decided to take to blogging about my food experiences.

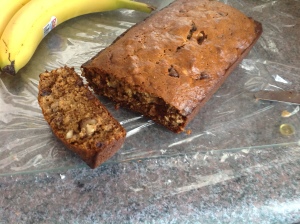
In honor of the name of this blog, my first post is banana nut bread. I made banana bread for the first time about four months ago. Before that, I’d never baked anything with bananas. Okay, well there was this one time that I tried to make banana nut muffins but didn’t have oil or eggs. Surprise, surprise when that turned out to be a complete disaster. Since then, I’d been afraid but my love of all things banana won out when I had four overripe bananas sitting on the counter.

I found a recipe on my favorite blog site and couldn’t wait to try it. I adapted it a little bit, though. A Certain Someone has an insane love for chocolate. When I mentioned that I would be making banana bread, his eyes got big and he begged if I could pretty please put chocolate chips in it. Since then, I have made banana bread four or five times and even skipped the chocolate chips once, but that didn’t go over so well.

Some tips:

  • If your bread gets too brown while baking before it’s done, wrap the top in tin foil. Personally, I like my bread a little more crusty so I don’t mind if it gets too dark.
  • This recipe makes two loaves. After letting them cool, you can wrap them in saran wrap and freeze one of them until you’re ready for it. The bread will still be moist after it thaws out.

Banana Nut Bread

IMG_0063

Source: Adapted from browneyedbaker.com

http://www.browneyedbaker.com/2010/09/17/banana-nut-bread/

Ingredients:

  • 2 cups all-purpose flour
  • 1½ teaspoons baking soda
  • Pinch of salt
  • 4 medium bananas, soft and ripe and mashed
  • 1 cup granulated sugar
  • ½ cup vegetable (or canola) oil
  • 2 eggs
  • 1 teaspoon vanilla extract
  • 1 cup walnuts
  • 1 cup semi-sweet chocolate chips

Directions:

1. Preheat oven to 350 degrees F. Grease two 8×4-inch loaf pans; set aside.

2. In a medium bowl, whisk together the flour, baking soda and salt; set aside. In the bowl of a stand mixer (or a large bowl), combine the bananas, sugar, oil, eggs and vanilla; mix well on medium speed (or use a whisk to thoroughly combine). Add the flour mixture and mix on low (or use a whisk to combine) until completely blended. Stir in the walnuts.

3. Divide the mixture into the two loaf pans. Bake for 35 to 45 minutes, or until a thin knife inserted into the center comes out clean. If the loaves begin to get too dark before they are done in the middle, cover with foil.